Using ngrok with the ngrok-go Library
Introduction
ngrok-go is an idiomatic Go package for embedding secure ingress directly into your Go applications. If you’ve used the ngrok agent before, you can think of ngrok-go as the agent packaged as a Go library. ngrok-go is open source and the API reference documentation is available on go.pkg.dev.
ngrok-go lets developers serve Go applications on the internet in a single line of code without requiring VPC routing, load balancers, certificates, or even ports. Applications using ngrok-go can leverage ngrok’s global network through the same net.Listener interface and net.Listen() code, making it incredibly simple to add into any existing application.
In this tutorial, you we build a Go App with ingress access and security provided by ngrok.
Note: This tutorial assumes you have Go already installed.
Get started with ngrok-go
Getting started with ngrok and the ngrok-go library is simple:
To start, sign up for ngrok
In the ngrok Dashboard, copy your Authtoken
Launch a terminal and create a go app and file:
mkdir hello-ngrok
cd hello-ngrok
go mod init hello-ngrok
go get golang.ngrok.com/ngrok
touch main.go
Edit the main.go file and add the following code:
package main

import (
    "context"
    "fmt"
    "log"
    "net/http"

    "golang.ngrok.com/ngrok"
    "golang.ngrok.com/ngrok/config"
)

func main() {
    if err := run(context.Background()); err != nil {
        log.Fatal(err)
    }
}

func run(ctx context.Context) error {
    tun, err := ngrok.Listen(ctx,
        config.HTTPEndpoint(),
        ngrok.WithAuthtokenFromEnv(),
    )
    if err != nil {
        return err
    }

    log.Println("tunnel created:", tun.URL())

    return http.Serve(tun, http.HandlerFunc(handler))
}

func handler(w http.ResponseWriter, r *http.Request) {
    fmt.Fprintln(w, "<h1>Hello from ngrok-go.</h1>")
}
In this code:- Lines 20-23: start the ngrok tunnel with a preset configuration
- Line 22: fetch your the ngrok auth token from your environment variable
- Line 34: serve a static page with a hello. :::
Save and close the file
Launch your tunnel replacing
TOKENwith your Authtoken from above:NGROK_AUTHTOKEN="TOKEN" go run main.goThe terminal will display an ngrok URL.
Access it to confirm you see the message
Hello from ngrok-go. Your Go application is now live on the internet, with a public url that anyone in the world can access.
Add edge functionality to your app
The ngrok-go library provides functions and configuration for all features available in ngrok. Everything you can do with the ngrok agent is available using our library. In this example, you can modify main.go to:
- Line 22: Use Google’s OAuth for authentication
- Line 23: Restrict access only for users from a specific email (i.e. to grant access only to users with gmail, replace
YOUR EMAIL DOMAINwithgmail.com) - Line 24: Use my-domain.ngrok.dev as a custom subdomain
- Line 25: Upon a successful authentication, send the user email in the email header
- Line 39: Print the email header.
package main

import (
    "context"
    "fmt"
    "log"
    "net/http"

    "golang.ngrok.com/ngrok"
    "golang.ngrok.com/ngrok/config"
)

func main() {
    if err := run(context.Background()); err != nil {
        log.Fatal(err)
    }
}

func run(ctx context.Context) error {
    tun, err := ngrok.Listen(ctx,
        config.HTTPEndpoint(
            config.WithOAuth("google",
                              config.WithAllowOAuthDomain("YOUR EMAIL DOMAIN"), ),
            config.WithDomain("my-domain.ngrok.dev"),
            config.WithRequestHeader("email", "${.oauth.user.email}"),
        ),
        ngrok.WithAuthtokenFromEnv(),
    )
    if err != nil {
        return err
    }

    log.Println("tunnel created:", tun.URL())

    return http.Serve(tun, http.HandlerFunc(handler))
}

func handler(w http.ResponseWriter, r *http.Request) {
    fmt.Fprintln(w, "<h1>Hello from ngrok-go, ", r.Header.Values("email"), ".</h1>")
}
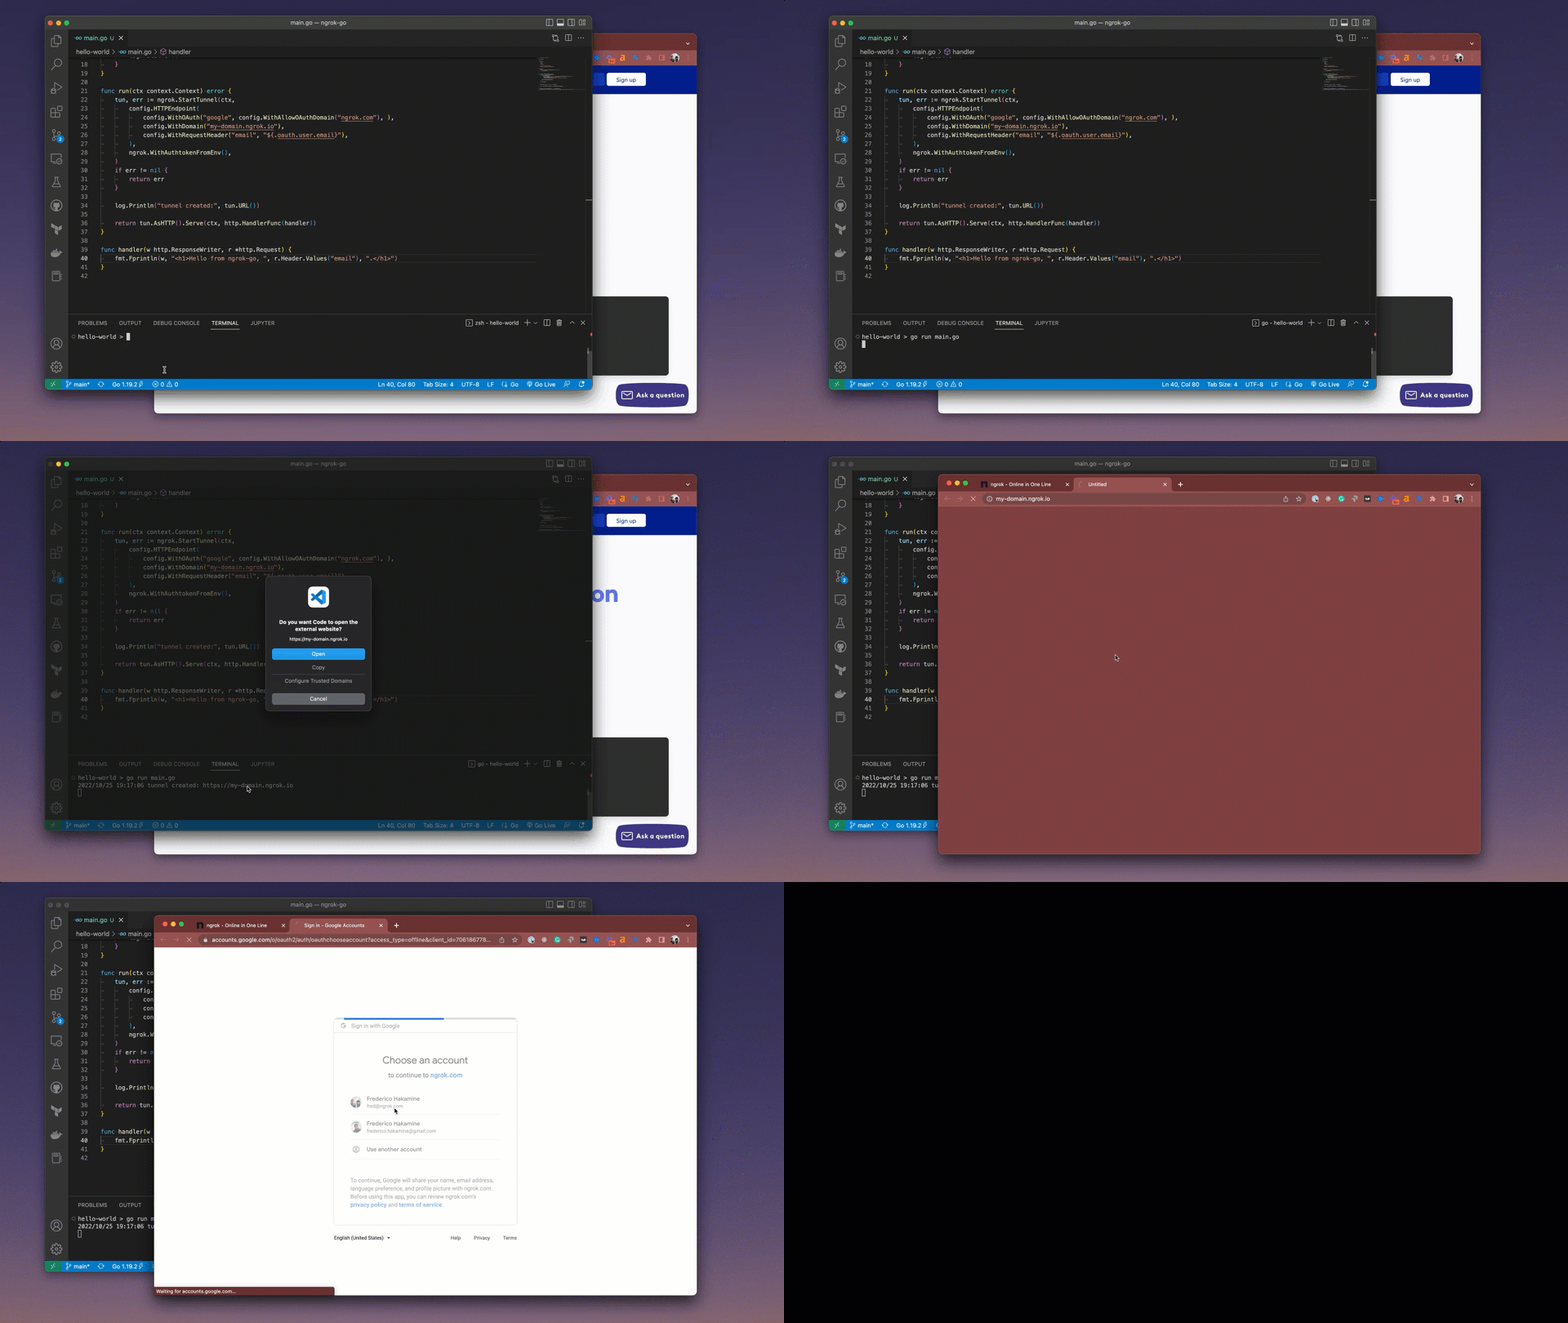
And we run the app just as we did before, again replacing TOKEN with our Authtoken:
NGROK_AUTHTOKEN="TOKEN" go run main.go
And this is our result:
